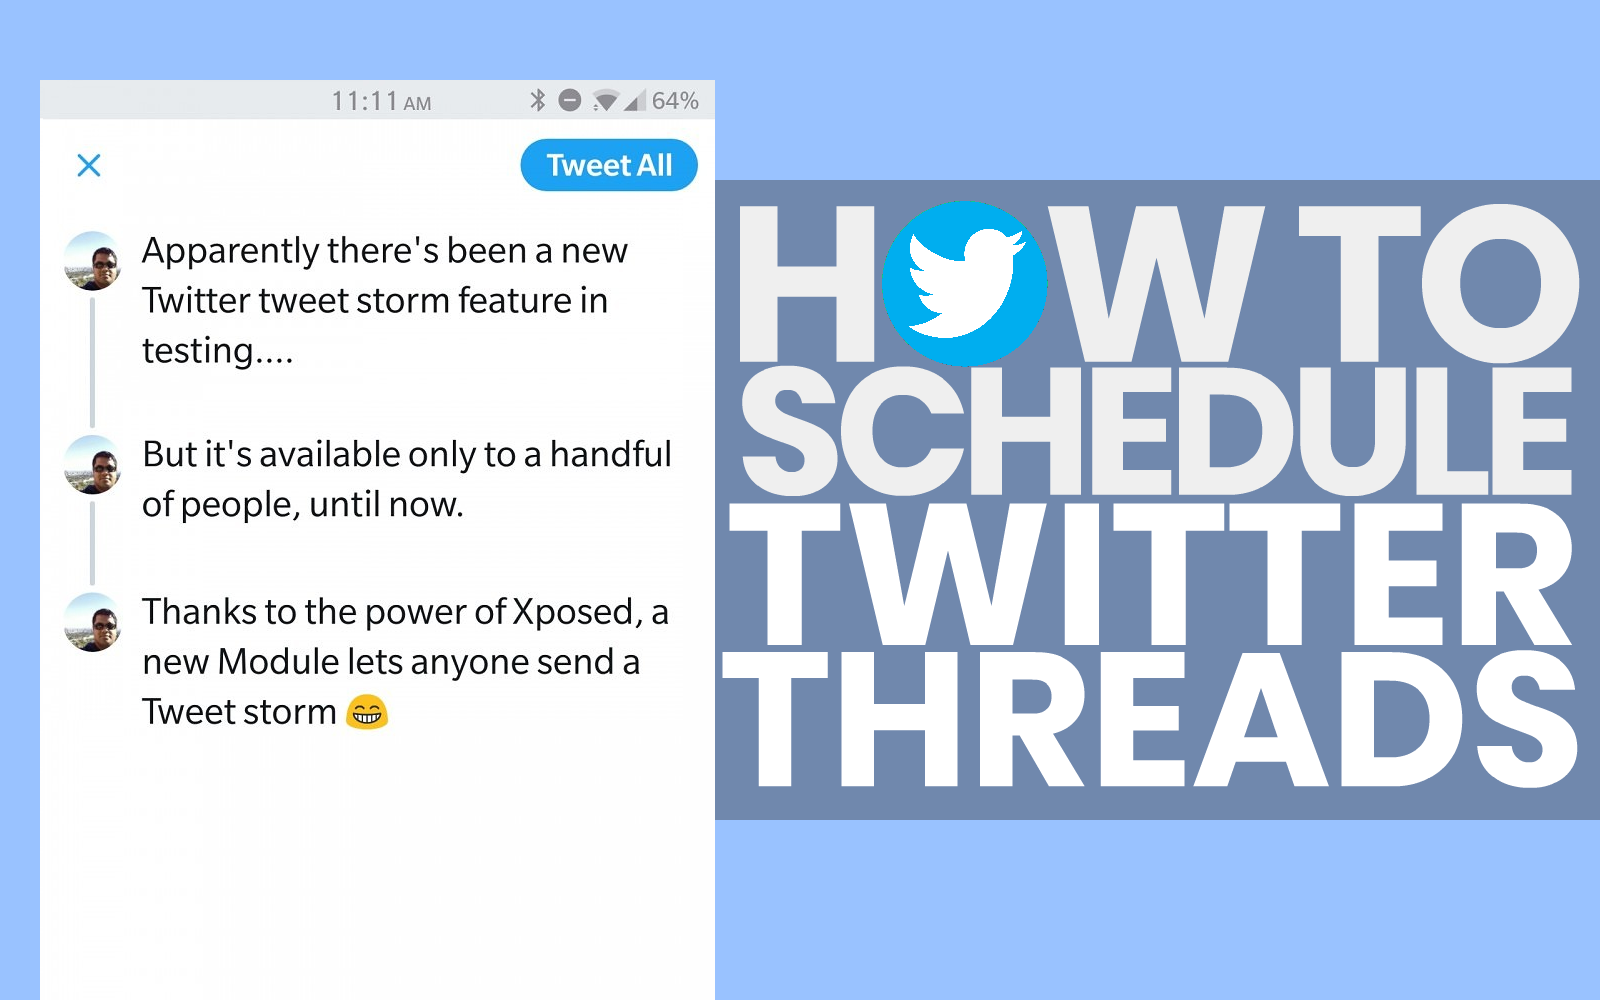
How to Schedule Twitter Threads (Step-by-Step Guide)
4 min read jay@zlappo.com Back to Blog

Twitter threads a.k.a. tweet storms are one of the best ways to increase engagement on your Twitter profile.
They're liked and retweeted a lot, and thus they get a lot of visibility, which in turn nets you new followers, traffic, and sales.
However, currently the vast majority of social media schedulers don't support Twitter threads.
(Buffer doesn't, Hootsuite doesn't, TweetDeck doesn't -- what's up with that? 🤔)
Fortunately for the rest of us who take Twitter growth seriously, we have specialized Twitter schedulers that do the job marvelously.
Here's how to schedule a Twitter thread, step by step:
1. Create a free Zlappo account
First, sign up for a free Zlappo account here: https://zlappo.com/.
Enter your email address, check your email for an activation email, and follow the instructions to activate your account:

2. Connect your Twitter account
Once you click on the activation link, you'll be brought to the Zlappo dashboard and be prompted to Connect your Twitter account to Zlappo:
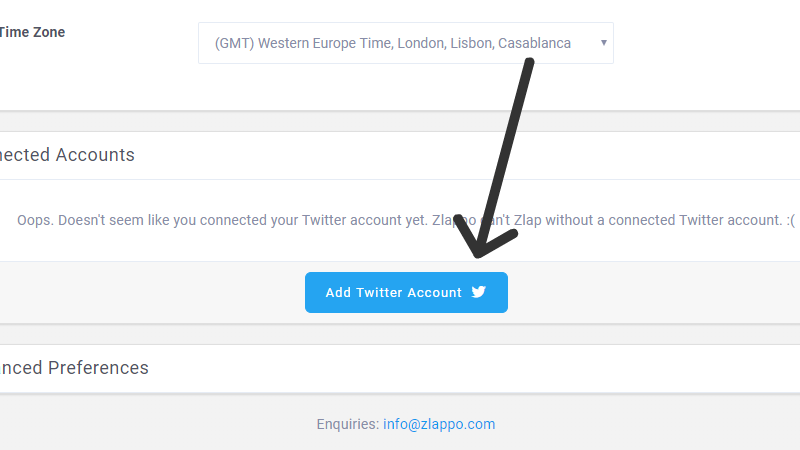
This step is necessary for Zlappo to post to Twitter on your behalf.
NOTE: We do not post anything to Twitter without your express permission.
3. Click "Schedule a Post"
After you connected your Twitter account, you should be brought to your Queue.
At the bottom right, you should see a green tab that says "Schedule a Post:"
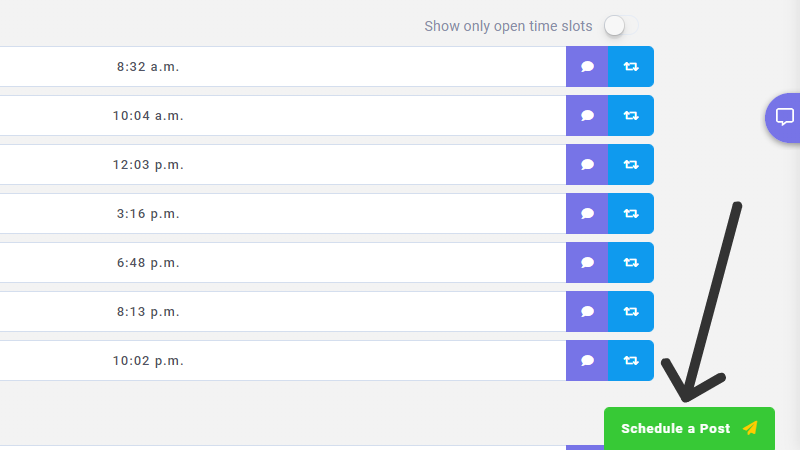
Click on it.
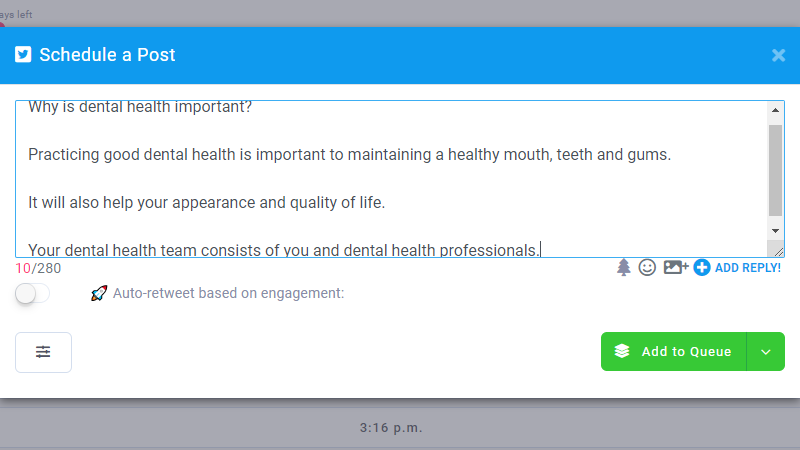
4. Start typing your first tweet
Start typing your first tweet of your thread.
Don't worry about anything for now except keeping it below 280 characters:
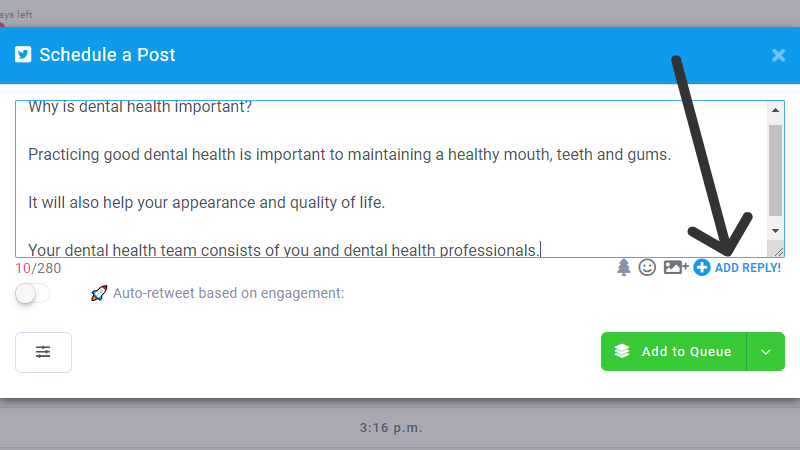
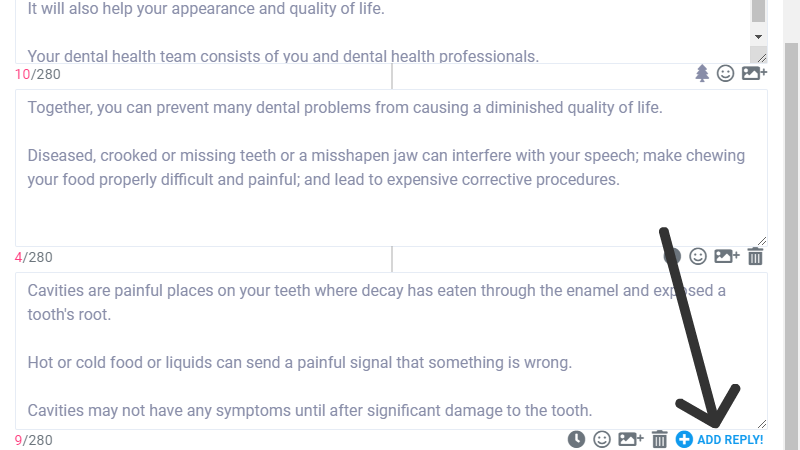
5. Click "➕ ADD REPLY!"
When you're ready to add your second tweet, click "➕ ADD REPLY!" at the bottom right of the text box:
This will add an additional text box below your first tweet:
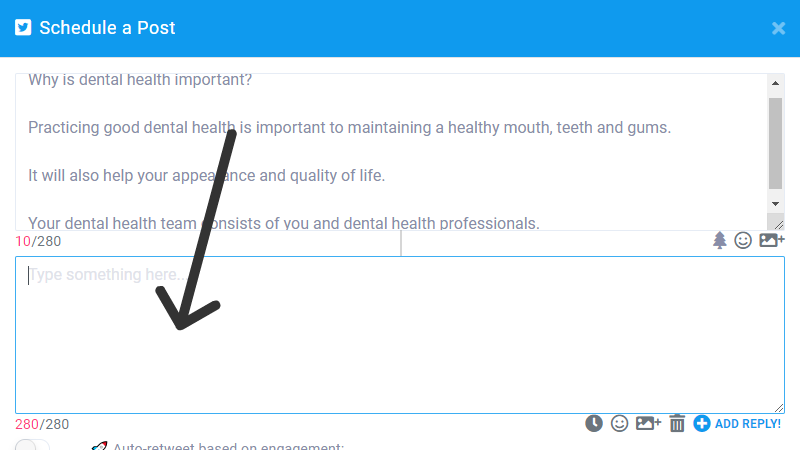
Continue writing and clicking "➕ ADD REPLY!" as many times as necessary.
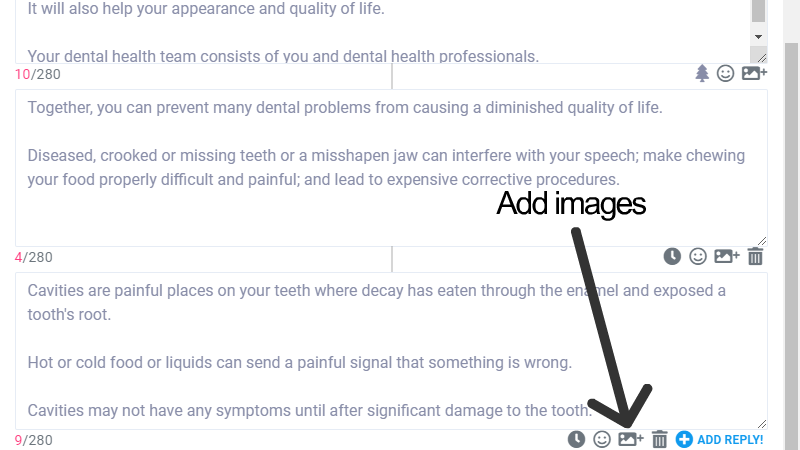
6. Add images if you want!
You can also up to 4 images per tweet, if you want to attach media to your thread.
Click on the image icon at the bottom right of the text box, and you'll be prompted to upload your media:
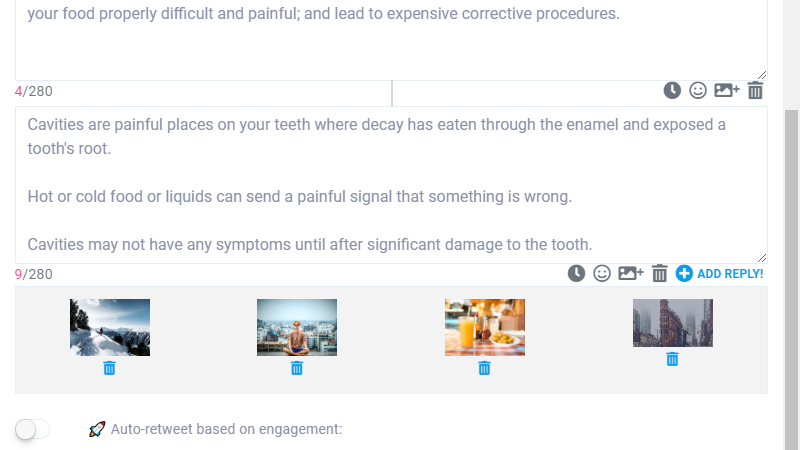
The images appear under the tweet to which they're attached, like so:
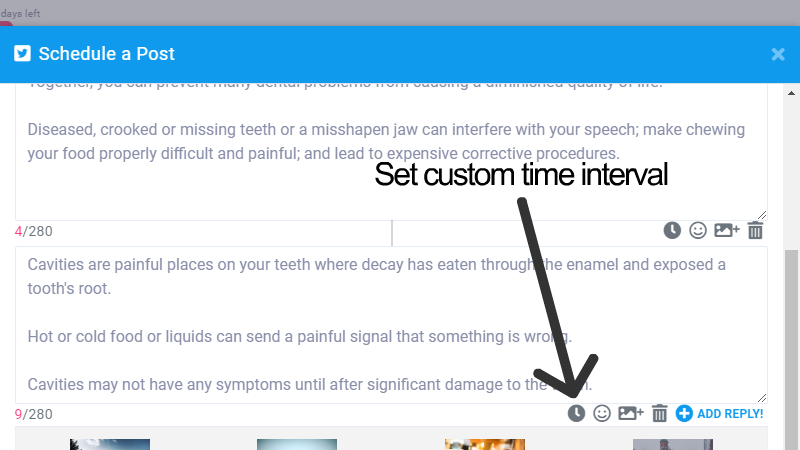
7. Select an optional time interval 🔥
Want to create a drip thread sequence instead, where the tweets go out at different times?
Zlappo handles this like a champ.
For each tweet in your thread, you can select a specific time interval for it to go out by clicking the clock icon:
You can then select your desired time interval:
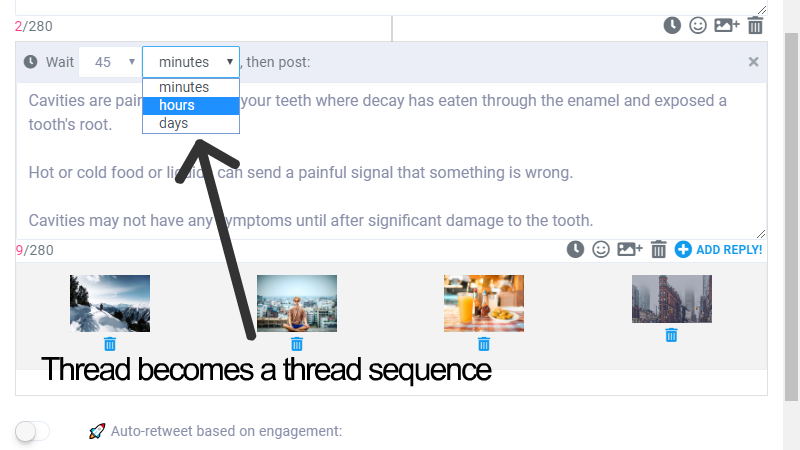
Whatever time interval you select, the tweet in question will be posted after said amount of time.
All the tweets are still posted in one single thread.
8. Click "Add to Queue"
When you sign up for Zlappo, we've created 7-8 daily time slots (from morning to night) at which your scheduled tweets will go out. You can change these time slots under Posting Schedule.
Click "Add to Queue" and your thread will go out during the nearest time slot:
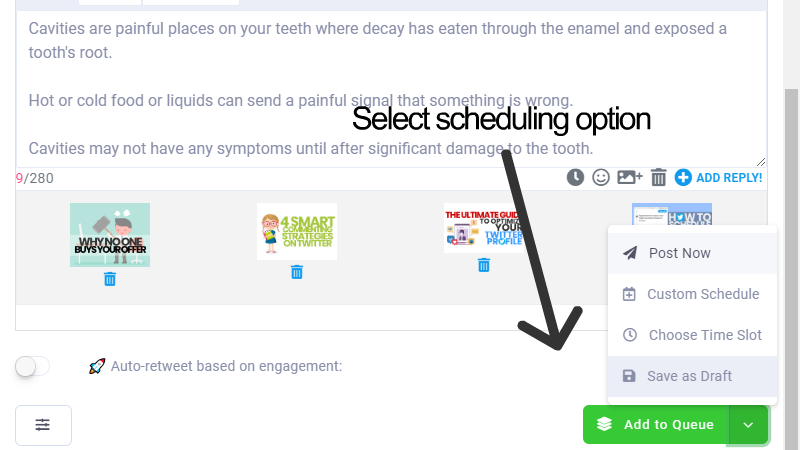
If you want to choose a time slot manually, or pick a custom time and date, you may do so as well.
Or you can even post it right away by clicking "Post Now."
Et voilà!
That's it! Now you can schedule Twitter threads like a champ! 💪
👉 Get started with Zlappo and schedule your first Twitter thread right now 👈
About the Author

Follow @therealjayber
Let's stay in touch, subscribe to my newsletter! 👇👇👇
Exclusive weekly email on: business musings, personal anecdotes, general self-improvement 💪